A quick word about the course I decided to take.
Looking slightly ahead, I obviously will need to earn money and I really, really do not want to go back into a school to do so.
In the next few days, I will produce posters and flyers offering my services as a tutor! I can teach both Maths and Science from the age of 9 or 10 up to 16 (GCSE). As Gloucester has lots of pupils for whom English is not their first language, it seemed a good idea to brush up on my English and offer basic lessons in that too.
Really, I would need a TESOL course for that, but they are just too expensive. So I have opted for a TEFL course, which is more for people who want to teach English abroad or online. The company I chose the course from was also offering a free specialist course and I have also booked the teaching English online course. I have recently become friendly with a young woman who does teach TEFL online to people all over the world, and is doing well in this.
After some procrastination, I started the course this morning. It begins with a 30 hour Grammar course and today I studied nouns: Concrete nouns, proper nouns, abstract nouns, group nouns, plural nouns, possessive nouns, and countable and uncountable nouns. I did find it quite difficult to grasp abstract nouns and got a couple of quiz questions on countable nouns wrong but then watched a you tube video which helped.
Tomorrow...verbs!!
Wednesday, 30 October 2013

My head is bursting
With ideas...that is!!
Hubs has wanted to produce a calendar for some time, using pictures from our vast postcard collection. Although it is probably a bit too late for a 2014 calendar, we decided we might as well give it a go. We looked around online for blank calendars that you can stick your own pictures to. I was quite excited by this, because it is an area that I could have contributed to. However, hubs (quite rightly) decided that it wouldn't be professional enough. So then he got some quotes from local printing companies, which were actually reasonable, and he'd picked out one of these to go with.
Then, at the last minute, a friend suggested that we print them ourselves using Microsoft Office and glossy lightweight card. It is easily doable, as Hubs found out in just a couple of hours play. All that is needed now, is to sort out the right photos, add details of Hub's business (he's a picture framer) and design a front cover.
Also, by doing it this way, we can more or less print to order.

Hubs has wanted to produce a calendar for some time, using pictures from our vast postcard collection. Although it is probably a bit too late for a 2014 calendar, we decided we might as well give it a go. We looked around online for blank calendars that you can stick your own pictures to. I was quite excited by this, because it is an area that I could have contributed to. However, hubs (quite rightly) decided that it wouldn't be professional enough. So then he got some quotes from local printing companies, which were actually reasonable, and he'd picked out one of these to go with.
Then, at the last minute, a friend suggested that we print them ourselves using Microsoft Office and glossy lightweight card. It is easily doable, as Hubs found out in just a couple of hours play. All that is needed now, is to sort out the right photos, add details of Hub's business (he's a picture framer) and design a front cover.
Also, by doing it this way, we can more or less print to order.
So, this then got my creative juices flowing. Why not use the same photos to produce notelets. I could present these in either a box or a gift bag.
As I own a binding machine, I could also produce notebooks in various sizes, again with these photos on the front and back covers.
Can't wait for Sunday when Hubs will produce the final versions of the postcard views we will use.
Friday, 25 October 2013
Icing
It's Friday, so it's baking day. I concentrated on cupcakes today as family will be coming for the day on Sunday. The first cakes I made were strawberry flavoured. As I added white chocolate chips to the icing, they weren't going to be my first attempt at piping! White chocolate curls are then sprinkled over the top. Sorry the photo is not the best. It was taken in artificial light which seems to cast an orange pall over everything in the kitchen.


The second batch of cupcakes are Red Devil cupcakes. I was finally able to use my new icing kit that hubs bought me last weekend. It was surprisingly easy to do, and surprisingly (or not!) messy. Even though the washing up water was very hot, it was incredibly difficult to get the buttercream icing off everything, even though I had made a sterling effort to scrape off and eat all that I could. I used a sponge, a dishcloth and eventually a paint brush to get the buttercream out of every nook and cranny! Here is the result. Not sure it was worth it!
Wednesday, 23 October 2013
My Prize
I was so excited when the postman delivered the mail this morning that I almost cried. In among the regular bills and circulars was a small parcel. When I opened it, I found that I had won a prize from one of the papercraft magazines that I buy. I only entered the competition last week and it was the first competition that I had entered for a very long time. It is a craft resource CD and a couple of stamps.

Tuesday, 22 October 2013
Card Making
I am an avid postcard collector and now have several thousand. I have a large collection of Edwardian Gloucester and Gloucestershire and also many greeting postcards. For a long time, I have been thinking about incorporating them into my card making.
A few days ago, Hubs photographed some of the cards for me. I then printed them out in various sizes.
This afternoon, I picked out a few images to try. The first thing I did was emboss them to make the card look more like glossy postcards. To go with the traditional feel I wanted, I stuck to layering the mini postcards on plain card, using some lace, ribbon, gems and paper roses. I love the cream and pink card. The black and white one still needs a greeting on it. I am not quite so pleased with this one. I wish I had used some red card for layering as well as red embellishments.
Again, I will need to make boxes to put them in.


A few days ago, Hubs photographed some of the cards for me. I then printed them out in various sizes.
This afternoon, I picked out a few images to try. The first thing I did was emboss them to make the card look more like glossy postcards. To go with the traditional feel I wanted, I stuck to layering the mini postcards on plain card, using some lace, ribbon, gems and paper roses. I love the cream and pink card. The black and white one still needs a greeting on it. I am not quite so pleased with this one. I wish I had used some red card for layering as well as red embellishments.
Again, I will need to make boxes to put them in.
Making Boxes
I had made 3 cards a few weeks ago using both my felting machine and traditional methods. I decided to put the felted pictures inside a small box frame to protect them. The result is quite pleasing.
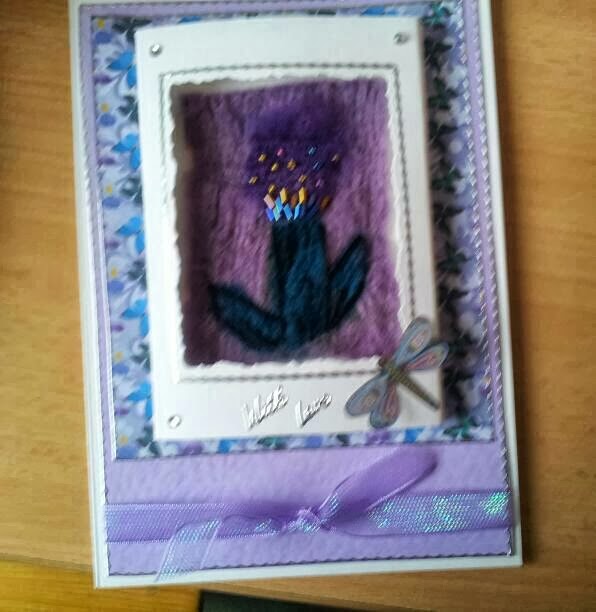


The cards would, of course, not fit in an envelope because they are too deep. So I spent a couple of hours this morning making boxes. A boring job!!
Monday, 21 October 2013
Craft Cupboard

This is the cupboard that I decided to sort through this morning!!
Fortunately, I found the wool I wanted to look at pretty quickly!
Subscribe to:
Posts (Atom)